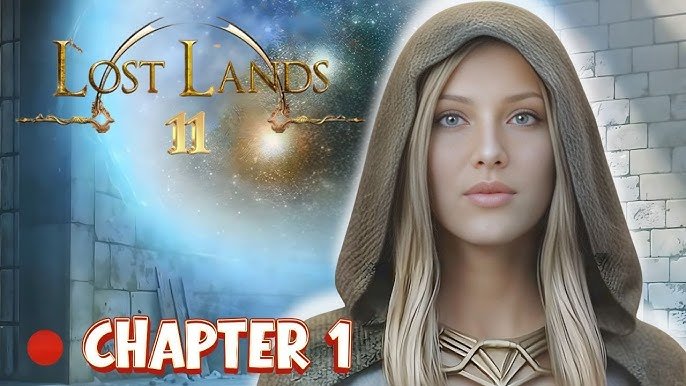
Lost Lands 11 — Susan Shepard opens a new book, and you’re once again transported to the Lost Lands, but decades in the past, when the Great Stronghold of the Five Worlds was still under construction. Before you are three stories, linked by a single thread of fate: the Sorceress, the Prince, and the Minotaur. Each story is not a standalone tale, but part of a larger fabric, where one character’s decisions impact the lives of others, where friendship and betrayal, the desire for freedom and the price of victory intertwine in subtle ways. It all begins with an incident at a construction site: a magic stabilizer has disappeared from the Balance Room, an artifact designed to balance the flow of magic around the tower. The foreman suspects the dwarven construction workers, two of whom have been captured in an unfamiliar city. You’ll take on the role of an investigator for the Magical Incidents Guild. You’ll investigate a kidnapping, infiltrate the garrison, rescue the captives, and uncover why the dwarves were suspected of involvement in the prince’s disappearance. Along the way, you’ll encounter a portal to a parallel world and realize that the theft isn’t just greed, but something capable of destroying order in several worlds at once. You’ll hold not only the findings and clues but also the fates of the characters in your hands. While helping the dwarves survive, you’ll discover that a strange portal appeared on the platform that day, and someone from another world stole the stabilizer. In one of the forests, you’ll encounter a poacher’s camp where a Minotaur, a powerful but surprisingly kind creature, is held in a cage. By freeing him, you’ll gain a trusted ally; he’ll help you reach the tower, but first, he’ll decide to test his mettle in the local city’s arena. If you’re having trouble solving a puzzle or don’t know where items are, you can check out our Lost Lands 11 walkthrough on our website to complete the story.
Walkthrough of the game Lost Lands 11
Here you can watch the full walkthrough of the game Lost Lands 11: Stories about the Sorceress, the Prince and the Minotaur (Lost Lands 11), namely all chapters.
- Chapter 1: Anomalous Event
Foreman
The letter that arrived at the guild was written by a certain Dudi-Molot, the foreman of this construction site. We need to find him and talk to him about the incident.

- Take manuscript 1/12.
- Take the candles.

- Use candles.
- Light the candles with a smoking pipe.

- Take the scrap.

- Solve the puzzle: Arrange the patterns as shown in the clue. To do this, click on the golden leaves to rotate the pieces.

- Take the feather, powder and snowflake figurine.
- Talk to the Foreman.
Portal well
To reach the upper floors of the tower, you need to activate the portal well.

- Take a crowbar and a saw.

- Use a crowbar.
- Take the handle.
- Take the first metal bunch.

- Use a crowbar.
- Use the handle.

- Take a candle.

- Use a candle.
- Take the scrap.

- Solve the puzzle: Move the platform with the arrows on the right to find damage and repair it with sections of the appropriate shape.
- Get two scraps and a shield figurine.

- Click on the scrap, use three scraps.

- Solve the puzzle: Drag and rotate the pieces to complete the picture.

- Get the drawing.
- Use a drawing.

- Use a candle.
- Use powder and pen.
The missing artifact
The Magic Stabilizer has disappeared from a special room in the tower. We need to find the artifact and return it.

- Talk to the Foreman.
- Take the anchor figurine.

- Take the coins.
- Use a saw.

- Use coins.
- Get the candelabra.

- Use a candelabra.
- Use coins.

- Move the ladder.
- Take the master keys.
- Move the ladder back.

- Take the fire figurine.
Take the sun figurine.

- Use the fire, sun and anchor figurine
- Use the fire, sun and anchor figurine.

- Use the shield and snowflake figurine.
Pillar of Balance
It’s unknown how soon the artifact will be found, and the magic needs to be stabilized as soon as possible. This needs to be done manually, as the book says.

- Take manuscript 2/12.
- Take the feather figurine.

- Use the feather figurine.
- Take the moon figurine.

- Use the moon figurine.

- Use lock picks.

- Take the second metal bunch.
- Use two metal bunches.

- Solve the puzzle: Guide the warrior to the triangular green flag. If the Minotaur reaches the warrior or the square red flag, the game starts over.

- Remember the symbols on the stone.
- Remember the symbols on the stone.

- Take the sword figurine.

- Use the sword figurine.
- Solve the puzzle: Group the figures into pairs of opposites.

- Solve the puzzle: Match the arrows to the correct symbols. You’ve already seen the hint.
- The solution is in the picture.
- Puzzle Solution: Find all the Weights of the Universe.
- Kettlebell 1/15.

- Kettlebells 2-3-4-5/15.

- Kettlebell 6/15.
- Use the axe.
- Kettlebells 7-8/15.

- Use a circular emblem.
- Kettlebell 9/15.
- Solve the puzzle: Swap the tiles and place them in the correct order. You’ve already seen the hint.

- The solution is in the picture.
- Kettlebells 10-11/15.

- Kettlebells 12-13/15.

- Use a rag.
- Kettlebell 14/15.

- Click on the vase.
- Use the key.
- Kettlebell 15/15.
- Get a cart with weights.
- Use a kettlebell cart.

- Solve the puzzle: Balance the pans using weights so that the numbers on opposite pans are the same. Use all the weights.
- The solution is in the picture.
Red Gate
Unknown soldiers have taken a construction worker to their castle. We must follow them through the red gates.

- Talk to Grandma.
- Take the key.

- Use the key.

- Take the knife.
- Use a knife.
Soup
I’ll have to make soup for the beggar woman so she’ll share the information I need.

- Talk to the Chef.

- Take the lotus.

- Take manuscript 3/12.

- Give the lotus to the Chef.
- Get the recipe.

- Take a scoop.
- Take a cauldron.

- Remove the fabric from the cart.

- Take the potatoes.
Take the carrots.

- Solve the puzzle: Place the animal tiles in the correct places. You’ve seen hints earlier in the game.

- The solution is in the picture.
- Solve the puzzle: Place all the tiles in the animal claws.

- Take the maggots.
- Open the recipe.

- Use potatoes and carrots.
- Take the float.

- Take the hook.
- Take green onions.

- Use a scoop to get rice.

- Take the threads.
- Use rice.
- Take an egg.

- Open the recipe, use egg, rice and green onions.

- Take kelp.

- Use the cauldron to get drinking water.
- Use the knife to get bamboo.

- Take 1/3 shiitake mushrooms.
- Take 2/3 shiitake mushrooms.

- Take shiitake mushrooms 3/3.
- Open the recipe, use drinking water and three shiitake mushrooms.

- Use kelp.
- Click on the bamboo.
- Use thread and a hook.

- Use maggots.
- Use the float to get a fishing rod.

- Use a fishing rod, get fish.
- Open the recipe, use the fish, get the ingredients.

- Use the ingredients.
- Puzzle solution: Find the objects.
- Take a fan.

- Take rice.
- Take the key.
- Take the ladle.

- Use the key.
- Take soy sauce.

- Take the spices.
- Use a fan.

- Take a skewer.
- Pour drinking water into the pots.

- Place the egg in water.
- Use soy sauce.
- Use a ladle.
- Use spices.

- Cut the egg.
- Wrap the fish in kelp.

- Take the fish.
- Chop green onions and shiitake mushrooms.

- Cut the potatoes and carrots.

- Take the vegetables.
- Use fish and a skewer.

- Take fried fish.
- Use fried fish.

- Remove the fillet from the fish.
- Use vegetables.
- Use rice.
- Take the soup.

- Give the soup to Grandma.

- Use a coin.

- Take the gong.
- Use the gong.
Both dwarves are somewhere within the garrison. We need to find them and escape with them back to the Lost Lands.

- Solve the puzzle: Repeat the drawing, connecting all the dots with rays. A ray can only be drawn along each line once.

- Use lock picks.
- Solve the puzzle: Press the mechanism in the center on both sides. To do this, rotate the rings with the lock picks to access the mechanism.

- Take a bunch of keys.
- Take wakizashi.
- Close the guards.

- Take the red stone.

- Use a keychain.

- Use the keychain in two places.

- Take a stepladder.

- Use red stone.

- Use a stepladder.

- Take the green stone.
- Take the note.
- Get a stepladder.

- Use a stepladder.
- Take the blue stone.

- Use blue and green stone.

- Use the note.

- Solve the puzzle: Rotate the cryptex sections and place the correct symbols using the hint.
- The solution is in the picture.
- Take the key.

- Take some sake.
- Use the key.

- Take the yellow stone.
- Take the spear.
- Use the yellow stone.

- Use the spear.
- Solve the puzzle: Press the sides of the spear to maintain balance and walk along the rope to the end.

- Lower the ladder.

- Use a coin.
- Take the key parts.
- Click on the key details.

- Use a keychain.
- Install the parts.

- Install more details.

- Install the remaining parts.
- Receive the assembled key.

- Use the assembled key.
- Use wakizashi.
Dust in the eyes
To distract the guards and stage a daring escape, you need to make a rocket and launch fireworks outside.

- Take the fireworks drawing.
- Take the poker.

- Take the coal.
- Open the fireworks blueprint, use the threads.

- Use coal
- Crush the coal with a mortar.

- Use a poker.
- Solve the puzzle: Place the stones in the correct positions. You’ve already seen the hint.

- Take saltpeter.

- Take sulfur.

- Take the tube.
- Open the fireworks blueprint, use the tube.

- Try to take the coin.

- Take the gong.

- Use the gong.
- Take a copper coin.

- Use a copper coin.

- Click on the package.
- Press the brush.
- Get copper filings.
- Open the fireworks blueprint, use copper shavings.

- Use sulfur.
- Use saltpeter.
- Solve the puzzle: Weigh the correct volume of substances using flasks.

- Take the gunpowder.
- Open the fireworks blueprint, use gunpowder.
- Pour the coal into the tube.

- Pour gunpowder into the tube.
- Use sake.
- Attach the threads.
- Get a rocket.

- Use the rocket.
- Take the burner.

- Use a torch.
- Let’s talk.
Alien
There’s a chance the Magic Stabilizer was stolen by a random visitor who came to the Lost Lands from another world. We need to find him.

- Take the figure key.

- Use a figure key.

- Take the wine and the hammer.
- Take the nails.

- Install the gear tooth.

- Install the remaining gear teeth.
- Use nails and a hammer.

- Go downstairs.
- Take the bottle.

- Take the seal insert.
- Take duckweed.

- Use a hammer.
- Take the board.

- Take a bucket of water.
- Use the board.

- Solve the puzzle: Melt all the ice cubes by dragging them into the fire niches.

- Take the old key.
- Use the old key.
- Take the cage.

- Take the snake catcher.
- Use a cage.

- Use a bucket of water.
- Take a hamster.

- Use wine.
- Use duckweed.

- Solve the puzzle: Click on the symbols in the correct order. You’ve already seen the hint earlier in the game.

- Take the metal skull.
- Use a hamster.

- Use snake catcher to get snake venom.
- Use snake venom.

- Place the duckweed in a press.
- Pour snake venom and wine into a spray bottle.

- Add flower pollen.
- Take a spray bottle.

- Use a spray bottle.

- Use wakizashi.

- Use the hammer to get a crystal.

- Take the key pendant.
- Use the crystal.
- Click on the key pendant, activate it, get the key pendant.

- Use the key pendant.

- Take the bottle of medicine.

- Take the whip.
- Use the whip.

- Take the metal spider.
- Click on the metal spider.
- Use the metal skull.

- Use the insert seal to get the spider key.
- Use the spider key.

- Solve the puzzle: Group the tiles around the spider in the correct position. Click on a tile to rotate it. Click on the spider to check if the tiles fit.

- Take the crystal.

- Take a silk scarf.
- Use a silk scarf.
- Use the crystal.

- Use a silk scarf.
- Place the third crystal from the ground.
- Use a silk scarf.
- Place the fourth crystal from the ground.

- Use a silk scarf.
- Use wakizashi.

- Use wakizashi.
- Take the spider’s leg.

- Use wakizashi.
- Take the second spider leg.
- Use wakizashi.
The Young Prince
The alien, revealed to be Prince Rikahiro, and the Guardian artifact were found in the lair of the spider Un’Hellar. The artifact must be returned to the Chamber of Balance and the boy to the portal.

- Use the potion bottle.
- Take the third spider leg.

- Use three spider legs.

- Solve the puzzle: Make each paw consist of a single material. Use the indentation on the pedestal to make room to move the pieces.
- Take manuscript 4/12.

- Take the luminous sphere
- Use the glowing sphere.

- Puzzle solution: Find and insert all the animal tiles into the wall.
- Camel 1/15.
- Wolf 2/15.

- Giraffe 3/15.
- Hare 4/15.
- Elephant 5/15.

- Use a trident to remove the cobwebs.
- Solve the puzzle: Place the tiles in the same-shaped slots. The chains cannot intersect.

- Tiger 6/15.
- Deer 7/15.

- Orlan 8/15.

- Bear 9/15.

- Use a hammer to break the jugs.
- Snake 10/15.
- Shark 11/15.

- Horse 12/15.
- Crocodile 13/15.
- Fish 14/15.

- Use the key to open the lock.

- Spider 15/15.
- Take the magic stabilizer.

- Use a magic stabilizer.
- Solve the puzzle: Balance the pans using weights so that the numbers on opposite pans are the same. Use all the weights.
- The solution is in the picture.