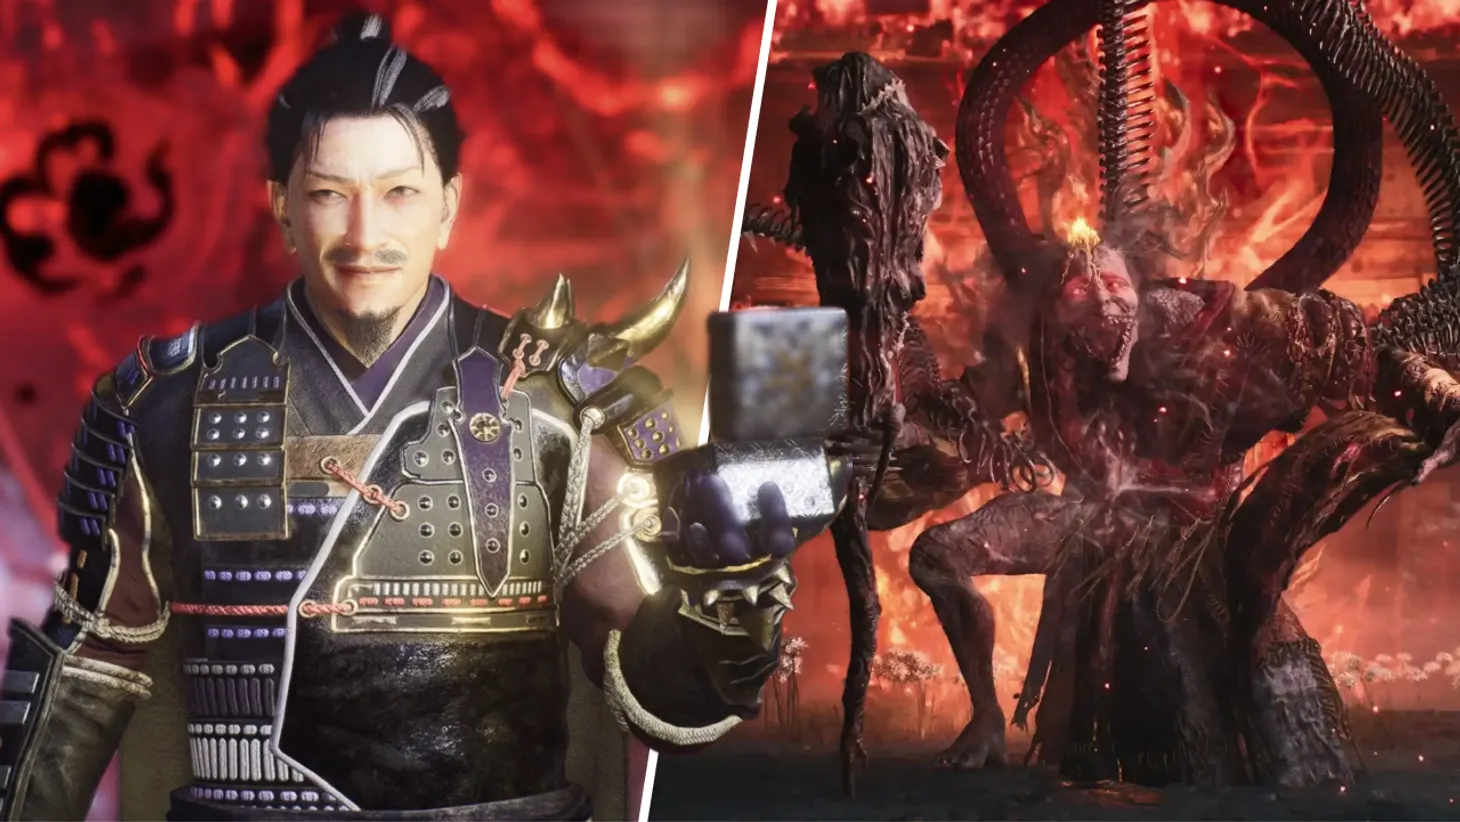
The new Nioh 3 is full of bosses! Some you’ll have to fight, while others are optional to progress on your path to the rank of Shogun and are well hidden throughout the map. It’s up to you to decide whether to take them on.
But the fact remains that defeating bosses will reward you with loot, help you level up, and shower you with combat experience. To help you defeat the bosses, we’ve put together a guide for you. Of course, it’s spoiler-filled, so read at your own risk.
Important: This guide is still being updated until all bosses are found.
How to defeat Yamagata Masakage
Mandatory boss
Era: Warring States Period
Mission: Escape from Hitokoto Slope
Region: Tokaido

Yamagata Masakage is the first boss you’ll face in Nioh 3. This fight introduces you to your very powerful “Living Artifact” ability. Technically, this battle completes the tutorial, but that doesn’t mean you’ll easily defeat him.
● Use Ninja Haze, get behind Yamagata, dodge his attacks, and block them—the enemy expends his Ki on attacks. When his Ki is low, unleash a series of your own attacks to stun him. Then, get a little closer until a red ring appears—right-click to finish him off.

● If things get too challenging, feel free to use your Oteko Cups to summon any ally using blue bonfires. Cups can be obtained by defeating Blood Grave enemies. There are plenty of nearby buffs, so don’t hesitate to summon NPCs for help.
● By the end, your Guardian Spirit will be charged. Press T to activate the invulnerable Living Artifact mode. With this boost, rush to attack Masakage.

Reward for victory: Palisade Breaker Level 2, Rosewood Tonfa Level 2, Longbow Level 2.
How to defeat Jakotsu Baba
Mandatory boss
Era: Warring States Period
Mission: Hamamatsu Incident
Region: Hamamatsu

You’ll encounter the second mandatory boss in Nioh 3 at the end of your first run to the Crucible. Before the battle, it’s best to level up your character to at least level 15. This will ensure you have enough health to withstand Jakotsu Baba’s attacks and will also allow you to deal enough damage to keep the fight from dragging on.
You should also consider gear or Soul Cores that reduce the power of fire or ice attacks. If you’re having trouble, try farming enemies to obtain elixirs and Living Artifact Energy.
When the fight begins, try to stay close to Jakotsu Baba . The boss has a huge attack range, but her attacks are limited up close. Her most common counter is to slowly lower her staff three times in a row. This attack is easy to dodge.

The fight with Jakotsu-baba requires quick reactions and observation – watch out for the snake heads on both sides, constantly move, and be ready to dodge attacks:
● “Charged Snake Bite” – A dangerous attack where the skeleton on the right retreats and glows red before lunging at you. If the snake retreats and glows, be prepared to dodge.
● “Staff Swing” – An attack in which Baba swings her weapon in a wide radius in front of her. To dodge, simply step back or to the side. Sometimes this attack is followed by “Claw Swing,” where the fiery skeleton attacks simultaneously with the main body. To dodge both attacks, dodge sideways.

● “Double Snake Bite” is a tricky attack. Jakotsu Baba jumps back and launches a snake forward, sending it to bite and strike twice. Dodge these attacks to the left. If the boss starts raising his staff, be ready to dodge again.
● “Triple Snake Bite” – The ice skeleton on the left side bites three times. The ice skeleton’s swing will signal an impending attack. Move sideways and don’t stop until it stops biting.
During the fight, Jakotsu Baba’s head can extend like a snake from the sides to perform a “Head Lunge.” Keep an eye on the boss’s head and deftly dodge to the side during the head lunge.

Once Jacosta Baba reaches around 40% health, she will teleport you to the Dark Realm, increasing her damage and giving her access to several new moves.
● The first is the Ice Snake’s headbutt, which slams repeatedly in a row. This attack can be difficult to dodge unless you can distance yourself or get behind it. Blocking is safer, but will drain a lot of your Ki.
● New move: Explosive Strike. The icy snake head throws back and then releases a hail of icy projectiles. It’s a good idea to change form just as the projectiles are launched, as this will allow you to land an Explosive Strike on the boss, even from a distance. Then use this to deal damage or close the distance.
● A third snake head will appear. It will attempt to lunge forward in a straight line and grab you. Watch out for the dark flames around the boss’s head, as this will signal the impending grab. Then roll to the side and begin a counterattack, as the extended snake will stun the boss for a couple of seconds.
Eventually, Jacosta Baba will take enough damage and return to her normal state. Repeat the process described above: stay close to her, using her burst damage and staff attack to gradually finish her off.

After winning, be sure to follow Ii up the steps to chat and receive the Guiding Mirror, which points to the Crucible Stones.
Victory Reward: Iron Reversal Glaive Lv15; Simple Claws Lv15; Tanegashima Marksman Rifle Lv15; Ninja Locks; Blacksmithing Text: Twin Snake Helmet; Guardian Spirit Enzo;
How to defeat Takeda Shingen
Mandatory boss
Era: Warring States
Mission: Battle of Mikatagahara
Region: Mikatagahara

After defeating Masakage, the Veil of Death will appear—it’s time for your second foray into the Crucible. At the end of this area, you’ll meet Takeda Shingen. Be prepared for a tough fight and to take damage from Life Corrosion. By this point, you should have enough Jizo Merit points to spend on upgrading your abilities in the Crucible.
After Takeda Shingen’s attack, it takes a long time to recover:
● His wide attacks are easily countered with quick strikes after blocking or parrying. When playing defensively, the Samurai Style mid-stance is recommended, as it allows you to regenerate Ki while holding a block.
● Takeda’s red attacks are forward-facing and easily predictable. A perfectly timed Burst Break is a reliable way to open up his attacks and deal significant damage to both his Ki and health.

● Shingen’s grab is also predictable —it’s easy to avoid by dodging to the side. Land a few extra hits, but don’t take too many risks. Note that he can use his grab from a distance, which will require you to dodge to the side.
● Dodge the Guardian Spirit’s attacks. Be prepared to dodge when Takeda Shingen thrusts his spear into the ground and summons his Guardian Spirit. It can attack alongside him and leave you vulnerable by quickly draining your Ki.
Summon a disciple from nearby Good Graves to provide a distraction and help deal some damage. Summoning disciples requires Ochoco Cups, which can be obtained by defeating ghosts from Bloodied Graves.

● Use talismans and buff items to increase your attack power. Note that these do not stack; they only extend the duration of the attack boost.
● Takeda Shingen’s Guardian Spirit allows him to use both fire and wind attacks, with a preference for fire. Use Fire Protection Talismans to increase resistance to fire damage.
If you’re having trouble with Takeda Shingen, feel free to back off, level up a few levels, equip better gear, and try again.
Rewards for completing: Basket Blade & Boar Cutter dual swords, level 51; Potsticker Spear, level 51; Samurai Curls; Blacksmithing Text: Basket Blade & Boar Cutter; Blacksmithing Text: Potsticker Spear.
How to defeat Baba Nobuhara
Mandatory boss
Era: Warring States Period
Mission: Battle for Futamata Castle
Region: Futamata

During the main mission of Nioh 3, as you climb Futamata Castle, you’ll soon encounter a massive yokai. This brute will give you quite a challenge with melee combos, water projectiles, and moving around the arena to attack.
Finding time to catch your breath in this fight will be difficult, but the Ninja Stance and regular dodging will be your best helpers:
● Counteract the burden with Ninjutsu and Talismans. Before engaging in close combat, use Ninjutsu to deal damage from afar. Baba Nobuharu is vulnerable to lightning, so the “Incredible Ninjutsu Discharge” and “Thunderstorm” Talismans will be effective.
● Summoning the Blood Edge Demon deals lightning damage when paired with a Lightning Guardian Spirit (such as Nekomata). It can be obtained as a summon by defeating the ghosts first, and then defeating the Blood Edge Demon itself, which will reward you with its Soul Core.

● Attack from behind. The best position to counter Baba Nobuharu’s attacks is from behind. Dash through his attacks and attack from behind without taking too many risks. Be careful, he can also hit you with a tail slash followed by an axe strike!
Beware of deceptions. Stay calm during the fight, as Baba Nobuharu can create illusions to mimic his attacks. This makes his red attacks and grabs especially dangerous, so avoid using Burst Break or dodging too early. Except for grabs, remember that you can block attacks if you’re unsure of the timing!

● Play defensively in Dark Realm. If you haven’t depleted his Ki and can’t punish him appropriately, focus on evasion and range control in Dark Realm. Use Ninjutsu to safely deal damage while keeping an eye on his Waterbending.
Reward for victory: Level 44 Leather Cestuses; Level 44 Genin Split Staff; Level 44 Hand Cannon; Demon Mino Amulet; Samurai Curls.
How to defeat Yamagata Masakage (youkai)
Mandatory boss
Era: Warring States Period
Mission: Battle for Futamata Castle
Region: Futamata

Yamagata Masakage’s comeback will bring your time in Nioh 3’s Warring States to a triumphant close. This time, he’s gained demonic powers and is even more powerful. By this point, you’ll have honed your combat skills and abilities, so facing Masakage shouldn’t be a challenge.
The fight with Yamagata Masakage is a little different this time around – the guy will be fighting on horseback. This makes the boss much more mobile, and the horse’s speed allows him to quickly close the distance for attacks.
Prepare any fire-resistant armor or talismans—Yamagata will use a lot of fire attacks. Due to Masakage’s speed, slow spells will be very difficult to use, as the enemy will constantly pressure you.
Masakage will charge at you from the start and perform one of several frontal strikes: a cross-shaped naginata strike, a blade strike straight ahead, or a spinning motion followed by an upward strike. Therefore, try to stay behind him or to the side of the rider as much as possible.
Thanks to his naginata, he has incredible attack range, so staying close to him and robbing him of this advantage is ideal. In a protracted war, the risk of losing to him is high. His horse may occasionally fend you off, but this is much easier to parry than blows from his naginata.

● Masakage can retreat and fire several fire arrows at you. If you see the boss draw his bow, rush towards him and take a position to either side of his horse. During this time, Yamagata is motionless, creating a great opportunity to close the distance and land a few hits. He also has a grab where he lunges forward with his spear, dragging it along the ground. Dodge this by rolling to the side just before the boss strikes.
● Yamagata has an easily countered Burst Break . He slams his spear down on the ground in front of him. When his horse rears up, change form and interrupt the attack, dealing damage to the enemy. At this point, you can safely stand in front of him.

Masakage will drag you into the Dark Realm. Before doing so, he’ll unleash a ring of fire that covers almost the entire arena. It can’t be unlocked, but it’s easy to jump over.
● In the Dark Realm, Masakage’s horse will leave a trail of fire as it runs, and his blade will be engulfed in flames. This will make blocking a bit more difficult, as you’ll take some damage even if the physical damage doesn’t go through.
Masakage will also gain access to a frontal attack that leaves fire puddles that explode after a few seconds. The rider will ride around the arena more often, but if you can avoid attempts to run you over, his horse will tire. He will also perform a jumping attack that causes a small explosion of fire at the point of impact.

Masakage is generally dangerous in the Dark Realm, so don’t linger in this area. Use your Living Artifact to deal more damage. After being banished from the Dark Realm, he will lose access to fire attacks.
Victory Reward : Smithing Text: General’s Crimson Armor.
How to beat Takeda Shingen 2
Mandatory boss
Era: Warring States Period
Mission: Battle of Saigagak
Region: Saigagake

Almost immediately after meeting him, you’ll have to fight this boss again. The second battle is different – Takeda is imbued with dark powers and transforms into a huge, four-armed, lion-like yokai. This fight is significantly more challenging! Shingen uses his extra limbs for a series of attacks, and he’s also faster. However, Shingen doesn’t have many moves that can deplete your health bar.
The boss deals wind and fire damage, so prepare armor and talismans with appropriate protection. When fighting Shingen, don’t just block his attacks; focus on dodging to avoid depleting your Ki.
The monster uses a combo of punches on the ground, claws, or a series of straight punches in front of him, which are difficult to dodge. The trick, however, is to roll to his back during the first strike, as Shingen will miss the second strike if he’s not facing you. But if you’re standing behind him, he’ll turn around and bring both fists down on you.

His most dangerous moves are the grab and the forward dash:
● When grabbed, he runs across the arena, dragging his forearms along the ground. This can be avoided by rolling past him while dashing behind the enemy.
● When attacking from a running start, he lunges forward and slams both hands into the ground in front of him. Roll to the side as soon as his fists hit the ground to prepare for some light damage in return.

After losing a third of your health, Shingen will send you to the Dark Realm. His new attacks are very easy to dodge. Using any talismans to increase your resistance to wind or fire damage will also help you survive.
● The first new move: Takeda jumps across the arena, then spins in the air and plummets down. Watch out for Shingen and use dodge to get a chance to damage him.
● Second new move. Summons a huge fireball and launches it at you! Just run away wherever you can. The ball moves very slowly, so it’s easy to avoid damage.
● Shingen will also perform a series of attacks that cause fiery explosions. These deal minimal damage unless you are directly caught in the blast.
● The final major trick is throwing a fireball while spinning in the air. This will significantly reduce your dodge time. To counter this, interrupt the boss during this move, just like you did in the Dark Realm.

If you focus on dodging his attacks (not blocking) and punishing his long swings, you won’t have much trouble winning.
Reward for victory: Guardian Spirit Kongojishi in lion form; Osafune Kanemitsu sword lvl. 55 (+1); Ninja Fuma headband lvl. 55 (+1); Samurai curls; Samurai text x2.
How to defeat the Great Tengu
Mandatory boss
Era: Heian
Mission: The Defiled Sacred Mountain
Region: Kamo Village

In the snowy Heian region, the first boss is the Great Tengu. This boss spends most of his time in the air, unleashing attacks with the power of wind and lightning. Before the battle, equip any armor with wind resistance and stock up on talismans that mitigate this effect.
Once you master dodging his most devastating attacks (grabs and area-of-effect strikes), draining his Ki and health will be easy. I guarantee the Great Tengu will be a fun fight! Ninja Style is recommended for this fight due to his superior mobility:
● Use fire ninjutsu and talismans. The Great Tengu is vulnerable to fire, so the ninjutsu techniques “Incredible Flames,” “Fragment Bombs,” and “Fire Talismans” prove effective.
● Back away during the red attack and lock on. The Great Tengu signals its red attack and lock on by flying into the air and diving at you. Back away to increase distance and give yourself more time to react, such as using Burst Break or dodging to the side.

● Avoid standing directly underneath him. When the Great Tengu leaps into the air, don’t stand directly underneath him, or you’ll take damage from the wind waves. Dash towards him as he lands and deal a few hits. This attack can deal damage through blocks.
● Back away when he plants his staff and enters the Dark Realm. Back away whenever the Great Tengu slams his staff into the ground, as he will soon summon a lightning attack around him.

In the Dark Realm, all of his physical attacks deal electrical damage. The boss will gain two new moves:
● First, he’ll dive at you even if he doesn’t use Explosive Strike or Grab. Like the previous moves, this will simply fly across the arena straight at you, so roll or block the attack.
Second. The boss will often combine this move with another diving attack in the opposite direction, or will hover in the air and launch a shockwave attack. In any case, it’s best to keep your distance from the Great Tengu after dodging to avoid getting hit by the follow-up attack.

When the Great Tengu leaves the Dark Realm, he uses a difficult-to-defeat attack. He’ll hop on one foot and then swing his fan to launch three fast-moving whirlwinds that track your location. If you’re nearby, block his attacks, as they’re difficult to dodge.
Rewards for victory: Kusarigama “Crescent” level 59; Veteran Mino Gloves level 59; Samurai Curls; Soul Core of the Great Tengu.
How to defeat Otoroshi
Mandatory boss
Era: Heian Mission: Black Feather Shrine Region: Sagano

Otoroshi is the easiest and most annoying boss in the game. This enormous monster is easy to defeat until it enters the Dark Realm, where it begins unleashing some very nasty attacks on the protagonist. Before the battle, equip any armor or talismans with resistance to water attacks, as the boss throws ice around the arena.
● This is a slow but powerful boss, so it’s better to dodge most of Otoroshi’s attacks rather than block them. Blocking his moves deals a lot of Ki damage, which will quickly deplete your energy bar.
The best time to dodge Otoroshi’s attacks is when he swipes his claws twice in front of him, followed by a powerful slam with both hands. As Otoroshi’s arm swings back, roll to dodge the attack, and repeat almost immediately after the animation ends. As the claws fly past, roll behind Otoroshi and strike.

● Two of Otorsha’s grabs can be easily avoided and countered. In the first, the boss teleports into the air and attempts to crush you with his weight, while in the second, he lunges across the arena to grab you. The first can be dodged by rolling in any direction, and the second by rolling behind him.
● When Otoroshi raises his hands in the air and creates several icicles, which will fly at you after a couple of seconds , go on the defensive and run left or right across the arena.
Once you’ve dealt enough damage, Otoroshi will enter the Dark Realm and stand on its hind legs. This is where things get tricky, as the monster will gain access to new attacks. At this point, use any talismans or Soul Core buffs that will reduce incoming water damage.

Beware of his attacks using a pair of huge ice clubs:
● If both clubs are facing the ground, it means he’ll jump up and bring them down. Explosive strikes have a wide radius. It’s important to make no mistake here: don’t roll to the side, but straight toward Otoroshi, ending up either underneath him or behind him.
● Otoroshi can also slam them into the ground several times in a row, then perform an “Explosive Strike.” Like last time, get close to Otoroshi and take away his ranged attack advantage.
When the monster fires multiple energy projectiles from its abdomen in a 180-degree arc, close the distance to keep Otoroshi stationary. This is an excellent opportunity to attack the boss and attempt to force it out of the Dark Realm.

Another dangerous move of Otorshi’s is that he takes a step back and then dashes across the arena, attempting to kick you. Block this move or roll behind him to land a few strikes. You’ll only have time to land a couple of attacks, as Otorshi usually follows up the move with claw strikes.
Once Otoroshi emerges from the Dark Realm, repeat the steps from the first phase: focus only on counterattacks when he uses grabs or claw attacks.
Reward for victory : Shugendo Hermit’s Hatches, level 72; Archer’s Hakama, level 72; Ninja Castles; Otoroshi’s Soul Core.
How to defeat Ibaraki Doji
Mandatory boss
Era: Heian
Mission: They are from Rajemon
Region: Khatidze

Use Ninja Style – it will help against Ibaraki Doji’s fast attacks and long-range lightning strikes. The Ninja skills “Yokai Banishment” and “Evil Dispersal Evasion” clear the Yokai Realms that are blocking Ki recovery.

● Use Ninjutsu and Talismans. Ninjutsu “Incredible Bubble” and “Shrapnel Bombs” to deal damage from afar.
● Ibaraki requires a long recovery time after her attacks, especially after using lightning magic. During these moments, rush behind her and deliver quick strikes.

● Once you’ve depleted her Ki, go on the offensive. Your attacks will stagger her and disrupt her attempt to counter.
● In the Dark Realm, Ibaraki strengthens her lightning magic and becomes more aggressive. Focus on survival, dodging attacks, and, if possible, clearing out the Youkai Realms.

Rewards for victory: Level 80 Mantra Sword; Level 80 Onme Hunter’s Hakala; Ibaraki Doji’s Soul Core; Ninja Crowbar.
How to defeat Kaiwara Kagetoki
Mandatory boss
Era: Heian
Mission: Ambush at the Abandoned Sanctuary
Region: Rokuhara

Kajiwara Kagetoki is the most infuriating boss in Nioh 3 due to the number of his annoying moves during the fight. He wields two axes and focuses on keeping you at bay by constantly summoning yokai. Kagetoki will also ignore your NPC ally, preferring to simply throw axes at you from a safe distance!
Kajiwara is extremely mobile, favoring sudden attacks and retreats. This can make it difficult for those wielding heavy weapons. If you have a strong ninja build, it’s best to use it to keep up with the agile Kagetoki.
Equip talismans that will either increase your damage, reduce your opponent’s Ki pool, or weaken their armor. Electric yokai and weapons can slow Kagetoki if you can apply a weakening effect to him. The main goal is to limit his mobility to constantly pressure him with attacks.

Kagetoki will summon yokai just like you: they simply appear, strike, and disappear! Here’s a quick list of all of Kagetoki’s yokai:
● Wasp. Two large wasps will try to sting you several times in a row. If they hit, you’ll receive a poisoned debuff and your health will begin to drop. Can be cured with an antidote.
● Yamabiko. Summons one Yamabiko that fires three sonic air blasts in a row. All three are blockable.
● Ninge. Fires a single crescent-shaped water projectile. It’s easy to dodge, as it’s released after Ninge emerges from the ground.
● Giant Wolf. One of the strongest summons! This yokai charges at you in a straight line, dealing heavy damage on impact. The wolf attacks immediately after appearing, so blocking is your best bet.
Mezuki. This is the boss from the first game, Kagetoki’s strongest summon. He’ll charge at you with his horns, then perform a spinning attack with his club. You can either block the attack or run away. Kagetoki will only summon Mezuki when he has less than half his health remaining.

When fighting Kagetoki, it’s important to time your attack safely. Most of his attacks involve throwing axes, making it difficult to close the distance. However, timing your throw can be calculated:
● During the fight, watch for the blue glow and the sound that accompanies his attack preparation. This indicates that Kajiwara will perform either a horizontal or vertical throw, depending on how he holds his axes. At this point, run toward him in a semicircle to ensure his axe throw misses, giving you a chance to close in on the boss.
● Explosive Strike – The enemy throws both axes horizontally in a straight line at you, then they return to him. Using Explosive Strike on both the flying and returning axes will teleport you to the boss while he’s stunned, allowing you to land a few easy hits. Kagetoki uses this move frequently, so try to counter with Explosive Strike whenever possible.

Rely on your NPC companion. While your ally doesn’t deal massive damage, he can help deplete the boss’s Ki, leaving him vulnerable to critical hits. He’ll also come to your aid if you take a lot of damage or run out of Ki. He can sometimes stun Kagetoki when he tries to grab you.
Victory Reward: Level 91 Bloodied Double Cleaver (+1); Level 91 Shinto Priest’s Hakama; Manual: Circular Motion; Blacksmithing Text: Heizo Armor; Ninja Horses.